
LAtest TRIPS

FIJI
I went to Fiji. It was aaaaamazing. The food was great, the people were friendly, and the scenery was breathtaking. I would definitely recommend it to anyone looking for a new and exciting place to travel.

New Zealand, mate!
I‘ve went to New Zealand and it was an amazing experience. I would definitely recommend it to anyone looking for an amazing country to travel to.

Hi,
I’m Anne with an E. Yep, that’s me. I’m an avid travel blogger with a green thumb. I’ve been to over 50 countries and all 7 continents, and I’m always on the lookout for new and exciting places to explore.
When I’m not on the road, I can be found at my family‘s farm in the Canadian countryside, tending to the garden and spending time with the animals.
So I like to post about gardending tips, DIY tips, crafts and arts, too. But my main focus is travelling and posting about my experiences.
Hope you enjoy my blog
WHERE I WENT.
I travel. A looot.
I’ve been to over 50 countries on all 7 continents, and I’m frequently posting about my experiences with other cultures and traditions.
Go check out my blog.



READ MY ARTICLES.
BLOG
Read about my travels, gardening tips, DIY projects, arts & crafts. I love it all.
LATEST ARTICLES.
DIY: Winter Science Posters
I’m a fan of science posters and botanicals as art. So here’s a quick DIY for a cool winter science poster you can make yourself.
I spent about $1 a piece on each science poster, using materials I already had. Yo
Materials
- Paint stirrers (you can usually get these free at the paint store).
- Stain (I used Minwax English Chestnut)
- Twine
- Hot glue gun
- Scissors
- Canvas paper
Here are some cool images you can use.
After downloading the images, simply print them out on the canvas paper with your printer. Then cut the paint stirrers with a table saw for a cleaner cut. Next stain the wood in one coat of the Chestnut stain and let them dry overnight.
After staining, use a hot glue gun to attach the wooden trim and the twine on the back. And that’s it!
Thanks
-Anne // https://theannewithane.com/
DIY: Tassel Throw
I’m not just a travel fan, I also love DIY projects.
Making your own tassel throw is a fun and easy way to add a personal touch to your home décor. All you need is some yarn, a dowel rod, and a little bit of time. With a few simple steps, you can make a beautiful tassel throw that will add color and texture to any room.
Here’s what you’ll need:
-Yarn in your desired color (I used two skeins of chunky yarn)
-Scissors
-A dowel rod or a thick piece of string
-Tape measure
First, you’ll need to measure out how long you want your tassel throw to be. I wanted mine to be about four feet long, so I measured out four yards of yarn. Once you have your desired length, cut the yarn in half.
Next, take one of the halves of yarn and tie it around the dowel rod or string about six inches from the end. Make sure the knot is tight so the yarn doesn’t slip off.
Now it’s time to start wrapping the yarn around the dowel rod. I wrapped mine about 50 times, but you can wrap yours more or less depending on how full you want your tassel to be. Once you’ve wrapped the yarn around the dowel rod the desired number of times, cut the yarn off leaving a six-inch tail.
Now it’s time to make the tassel itself. Take the end of the yarn and thread it through the loop you made at the beginning. Then, pull the yarn all the way through so the loop tightens around the wrapped yarn.
To finish the tassel, cut a piece of yarn about 12 inches long. Tie this piece of yarn around the top of the tassel, about an inch from the top of the dowel rod. Then, cut the bottom of the tassel so it’s even.
Now you have a beautiful tassel throw that you can use to add a pop of color and texture to any room in your home.
Other Inspo:
Thanks
-Anne // https://theannewithane.com/
Crafts: Thanksgiving Table
Growing up my mother was always a big stickler for Thanksgiving–remembering to give thanks and not focusing on the commercialism of Christmas. Of course it helps that she was born on Thanksgiving and her birthday always falls on or around Thanksgiving each year (since Thanksgiving is celebrated the fourth Thursday of the month).
Thanksgiving is more than just a day off from work and a chance to stuff ourselves with turkey. It‘s a time to reflect on all that we‘re thankful for, including our families, friends, and all the good things in our lives. For many of us, Thanksgiving is a warm and happy time spent surrounded by loved ones. It‘s a day to give thanks for all the blessings in our lives, both big and small.
We may not always realize it, but we have a lot to be thankful for. From the roof over our heads to the food on our table, we are truly blessed. On Thanksgiving, we often take time to count our blessings and express our gratitude. We may not realize it, but this simple act of gratitude can have a profound effect on our lives. Studies have shown that gratitude can lead to increased happiness, improved health, and even increased lifespan. So, this Thanksgiving, take a moment to reflect on all that you‘re thankful for. You may be surprised at just how much you have to be grateful for.
Here’s my thanksgiving table as an inspiration to you all. Hope you like it 😉

Thanks
-Anne // https://theannewithane.com/
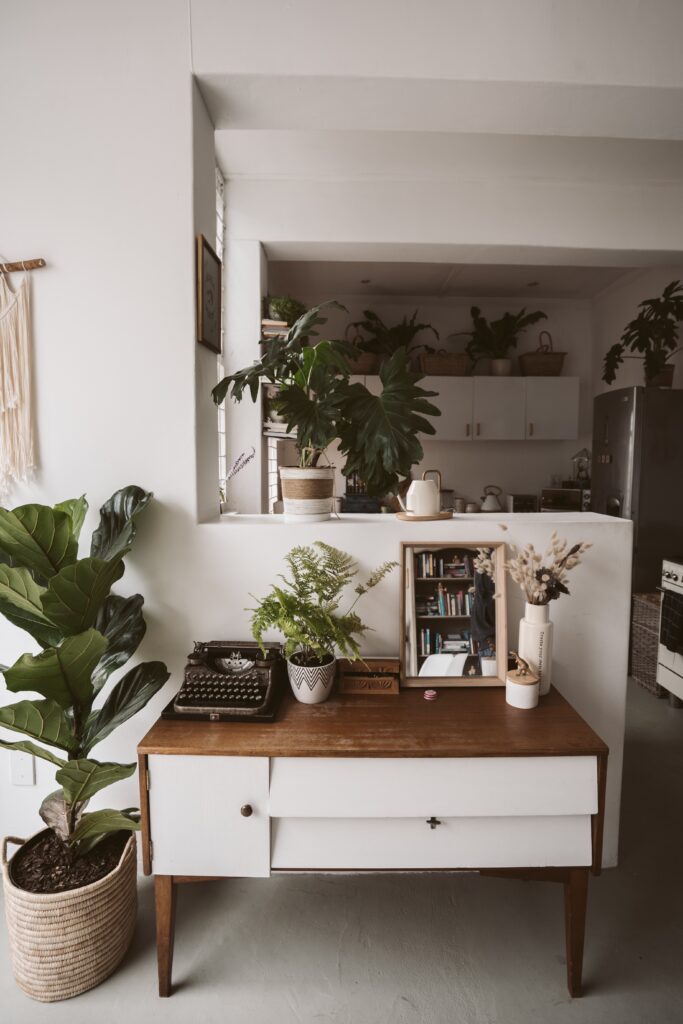
Decorative Room Dividers – How I use them.
Room dividers are an excellent way to add a touch of style and personality to your home while still providing functional benefits. Decorative room dividers can help to create separate spaces within a single room, add privacy, reduce noise, and even improve the acoustics of a space. When choosing decorative room dividers, there are many things to consider in order to make the most out of them.
First, it is important to consider the layout and size of the space where the room divider will be placed. Room dividers come in various sizes, so selecting one that is appropriately sized for the space is important. It is also important to take into account the placement of furniture and other items in the room when selecting a room divider. Room dividers can be placed in several different ways, so it is important to consider how you want the divider to look in relation to everything else in the room.
Once you have selected an appropriately sized room divider, you can then begin to think about what kind of design you would like. Decorative room dividers come in a wide range of styles, so it is important to select one that fits the space’s overall aesthetic. Many room dividers feature classic designs, such as latticework or panels with intricate carvings, if you are looking for a more traditional look. For a more modern look, there are room dividers made from materials such as metal or glass that can add a sleek and contemporary touch to any space.
When selecting a decorative room divider, it is also important to consider how it will be used. Room dividers can be used to create temporary or permanent separations between spaces. If you plan on using the room divider regularly, choosing one that is durable and easy to move is important. Suppose you plan on using the room divider only occasionally. In that case, many lighter-weight and more fragile options can still provide a beautiful and stylish touch to your home.
No matter what kind of decorative room divider you select, it is important to keep in mind the overall goal for the space. Room dividers can be used to create various effects, so it is important to select one that will help you achieve the specific look and feel you are going for. With so many different styles and designs available, there is sure to be a room divider that will perfectly suit your needs and taste. With a little bit of planning and forethought, you can easily transform any space in your home with the help of a decorative room divider.

New Zealand Trip
I recently had the opportunity to travel to New Zealand, and it was an amazing experience. I was able to see some of the most beautiful scenery in the world, and I also got to experience some of the country’s unique culture. Here are some of the things I did and saw during my trip.
One of the first things I did was go hiking in the Southern Alps. The scenery was absolutely breathtaking, and I even got to see some of the country’s native wildlife. I also went white-water rafting in the Tongariro River, which was a lot of fun.
I also got to experience some of New Zealand’s unique culture. I visited a Maori village, where I learned about the country’s native people and their culture. I also got to try some of the traditional Maori food, which was very delicious.
Overall, I had an incredible time in New Zealand. I was able to see some of the most beautiful scenery in the world, and I also got to experience some of the country’s unique culture. I would definitely recommend visiting New Zealand to anyone who has the opportunity.

Fiji Trip
The Fiji Islands are a group of over 300 islands in the South Pacific Ocean. They are known for their white sand beaches, crystal clear waters, and lush tropical foliage. I was lucky enough to travel to the Fiji Islands and experience their beauty first-hand. Here are some of the amazing things I was able to see and do while I was there.
One of the first things I did was go snorkeling. The water was so clear that I could see the colorful fish swimming all around me. I even saw a sea turtle! I also went scuba diving and saw even more amazing marine life, including a shipwreck.
In addition to the beautiful beaches, the Fiji Islands are home to some of the most lush and tropical vegetation I have ever seen. I went on a hike through a rainforest and saw waterfalls, rivers, and exotic plants and animals. I even saw a cassowary, which is a type of bird that is native to the Fiji Islands.
The Fiji Islands are also home to a number of interesting cultural attractions. I visited a traditional Fijian village and saw how the locals live. I also saw a dance performance and learned about the Fijian culture.
Overall, I had an amazing time in the Fiji Islands. If you ever have the chance to visit, I highly recommend it!


